Winter Activities
Three fun things you can do with your horse this winter without freezing your buns off!
Winter brings short days, cold temperatures and hard footing. That might put a damper on your carriage driving, but it doesn’t have to bring all horse activities to a full stop. This time of year is a great time to work on some fundamental skills that will lead to better driving in the spring. Here are a handful of fun, easy things you can do with your horse this winter.
Ground Driving
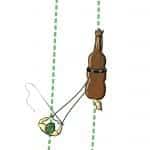 Ground driving is when the driver walks alongside or behind a horse that isn’t hitched to a carriage and drives “from the ground”. When I’m ground driving a single, I generally stand about 2-paces off to the side and behind the horse. This can be a very effective exercise to work with horses on things such as walk-halt transitions, stretching into the walk, and getting straight halts or reinbacks.
If you’re a pair driver, you can learn a great deal about driving a pair while ground driving! You can ground drive the exercises exactly as they are described below. The main difference is that you’ll need to stay fairly centered behind the pair. Moving off to the side has a significant impact on the length of the coupling reins.
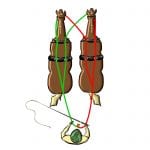 Without the carriage tying the horses together, you’ll gain a much better understanding of how your rein handling effects your horse’s position in relation to one another. The corners will illustrate the difference in stride they must take to remain together as a pair.
An easy exercise to work from while ground driving is a figure 8 built from two squares. Use cones to mark the corners and the centerline of the two squares. Mark the center of the 8 with a pair of ground rails to drive the horse between. This simple exercise gives you 4 right turns, and 4 left turns, plus a really great place to get straight for halts, and reinbacks.
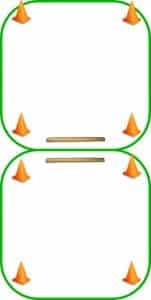 You can use the corners to encourage the horse to take the outside rein forward through the turns, creating balance, and therefore bend as you drive the figure. Do this by carrying a consistent outside rein, as you activate (pull or wiggle) and release the inside rein approaching each corner. Time your activation to when the inside hind leg is about to leave the ground each time. Give a larger release than you think you can get away with after each activation. You’ll be surprised how much you can release the inside rein as your horse works through the turn!
Halting each time you come to the centerline of the exercise gives you the chance to develop the halt as a command, rather than pulling and holding the horse to bring him to a halt. As the horse becomes wise to the exercise having a halt each at each of the three places, he’ll begin to anticipate the halt. You can leverage that anticipation by providing the verbal and rein command that you want the horse to recognize as your halt command, just before each halt.
After your halt, wiggle the bit a little left and right to ask your horse to reach his head forward and down. Practice your timing to ask the horse to walk on to coincide with that reaching down action as you yield the rein without giving up contact. This will vastly improve your upward transitions!
At the center of the 8, you can work on the reinback in the way you worked on the halt. Take a slightly firm contact, and give two or three activations of both reins equally. As he begins to step-back, soften your contact, but ask again before he stops moving back.
Start small, with just two or three steps, ending the reinback before the horse gets crooked. Build upon success by adding a step every third reinback. Over time you can build really easy, straight runbacks that go back as you want!
Longlining
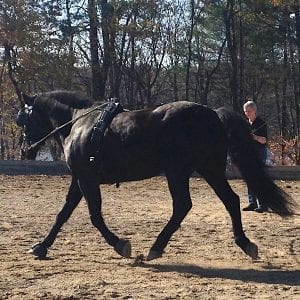 When you’ve become adept at ground driving the square 8, you’re ready to move onto longlining. Longlining differs from ground driving in that your goal is to work your horse on a 10-15 meter circle with you at the center. (Sorry pair drivers, you’re going to have to do one horse at a time for this exercise!)
Similar to lunging, you can work your horse at the walk, trot, and canter. Instead of driving reins, use a lightweight pair of 20-foot cotton longlines. (I really like the ones sold by Perri’s Leather (no, they are not leather)) This skill is more valuable and effective than lunging because you have full control of the bit and bridle the whole time. So you can ask your horse for more specific types of movements.
The transition from ground driving to longlining can be a little tricky at first. You can start the session on the same exercise you used in ground driving. Instead of a square 8, mark it out as two circles, and eliminate the ground-rails.
On each circle, along behind your horse to the inside of his circle. You can do two or three circles in a row, then halt at the center as you did in the ground driving exercise. When you ask him to walk on, steer toward the other circle as you follow forward, changing sides behind him over the halt mark.
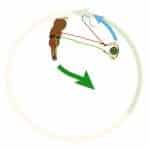 As you get more comfortable, you can migrate further into the circles as your horse walks around you. In one or two sessions, you’ll be handy enough that you can ask your horse to change directions through the center of a circle instead of having two circles to navigate. Once you’re there, you’re ready to give some trotting a try (and maybe even cantering).
Longlining is a great place to work on half-halts and transitions. Just as you used predictable halts to improve the quality of the request while ground driving, start doing your transitions in the same places on the circle. When you’re good at that, start moving the transition points.
My go-to workout routine for longlining is the Dial Lesson Plan. It provides lots of transitions, but the transition point migrates by a quarter or a half circle each rotation. For each quarter circle of walk, there is a half circle of trot. This creates a great rhythm for a 20-minute workout with your horse!
Moving off the whip
Many driving horses only understand the whip as a forward command (and others just ignore it!) The winter time is a great time to define the whip as a communication device for movement to the side and for bending.
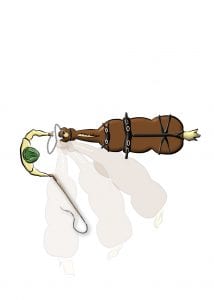
The project can be started in the barn with a dressage whip. Simply carry your whip as you groom your horse. Each time you need the horse to move left or right, touch whip twice with the whip, then ask him to move as you normally would.
Bring your horse to a work area in a halter and lead rope with driving whip in hand. Have your horse stand still in front of you, then reach your whip to the horse’s side, and ask him to step away from it. You can lead the horse a little to indicate the direction you want the horse to step.
When your horse is good at moving off the whip for the in-hand exercises, you can do the exact same exercise with harness and a driving bridle on. Stand in front of your horse at first. As you have success, try standing by the horse’s as you ask him to move off your whip.
Finally, combine the sideways movement with forward movement by returning to the ground driving exercise. This time make each corner about 5-10 feet early. Then, add that little outside rein trick I told you about while you touch him on the inside of the turn with the whip. With practice, you’ll be able to get him to give you a yielding movement to get around the cone. COOOL!!
Here’s the lesson plan ➙ Moving Off the Whip that you can download, print out, and bring to the barn to practice.
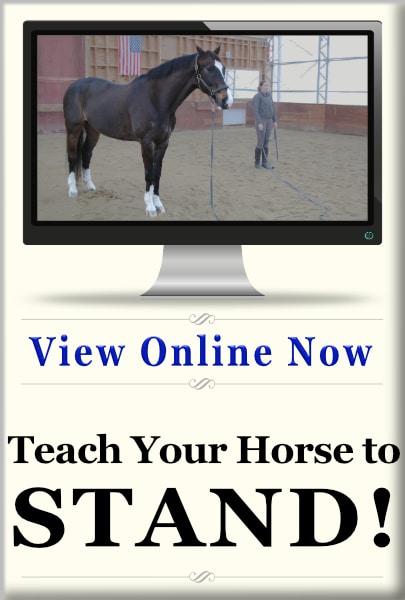
Finally Get Your Horse to Stand!
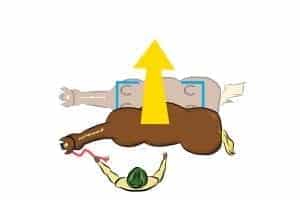 This is one of those subjects that I can’t possibly harp on enough. If you want your horse to stand for hitching, mounting, or wait patiently while you have a discussion with a friend or instructor, you have to first teach him how to stand.
The winter time is a great time to get started on this. The best place to start this training is in the barn in short 10-15 minute sessions. That means you can wear all of your warmest clothing and you don’t have to groom or tack up your horse. Heck, leave his blankets on!
The training all starts with getting your horse to stand still in one spot. By “one spot” I mean, one really specific spot. Set your horse up in the isle and draw a box around his feet. You can even draw the box before you bring him out in the isle.
Once you have your “standing box” drawn out, ask him to take his place in it, and stand. He’s going to move (we know that, right?) It’s okay, each time he moves, return him to the exact position that you started him in.
When you’re returning him to his standing spot, follow just one rule: No Circles!
If he moved forward, ask him to step backward to return to his spot. If he moves sideways, make him move sideways back to his spot. The idea is that you keep him facing the same direction the whole time. For some reason, that really helps get the message through to horses that you are looking for a very specific result.
Just getting this training with the few instructions I’ve given you here will go a long way to getting your horse standing reliably. But if you want more instruction, with specific lesson plans including how to get him to stand after he’s hitched or under saddle, check out my Stand Page.
Now It’s Your Turn
Wow, all of this stuff will be so handy when spring comes and you can finally dig that carriage out of the ice! So don’t despair the winter. Use it. None of these exercises take up a huge amount of space, and you don’t have to do them for long sessions to see results. Bundle-up and go play with your ponies!
What do you do to make it through the winter blues? Share your ideas in the comment section below.





Andy, approximately what are the dimensions of the 2 squares that make up the figure-eight for ground driving?
PS-I have only been competing in DT since May ’17 and eagerly look foward to this year’s calendar of events. I have become an avid follower of yours since discovering your website, online classes, and articles a few months ago. Please let me know if/when you are in Texas.
Thank you for sharing your gifts.
Karla
Hi Karla,
You can make those squares just about any size you like. Typically I’d be doing this exercise in a riding arena (usually about 20m X 60m) so I just fit them into the arena with some extra space around. If there’s a larger work area, making the squares about 20-30 meters across works well.
I haven’t been to TX for quite some time. Perhaps someone will organize something in the future.
Andy
I would like to organize a clinic with you here in Texas, perhaps in the fall. I will discuss with you sometime soon.
Thanks for the winter workout tips, Andy. The exercises look great. Can’t wait to get to the barn!